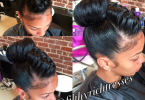
A double French braid is a great deal simpler than you might think. Instead of one large braid in the middle of the head, you part the hair into two sections, then braid each section individually. Toward the end of the process you can either continue to keep braiding separately or you can join the two braids. The only caveat is that this style is generally not possible for a woman who has layered hair.
Ready to start? Great! First, thoroughly brush your hair, making sure that there are no tangles. Using the pointed end of a teasing comb, part you hair in the middle. Continue the part all the way down the back of your head until you get to your neck. Choose which side you want to start with and clip the other side out of the way.
Reach up and, starting from your hairline in the front, take a section of hair. (The hair you want to grab is growing on the top of your head. Leave the hair growing on the back of your head alone for now.) Then start your braid. You’ll do three repetitions, and then start adding hair to your existing braid. You will be adding hair to the two outside sections as you continue braiding.
IMPORTANT: You want to braid tightly, but not too tightly. Splitting scalp skin from braids that are WAY too tight are definitely not a pretty sight and are extremely painful. Seriously.
Once you have no more hair to add to the braid, stop and tightly clip this section off. (If you want to style your hair in two separate braids, you can keep going till you run out of hair and then you’re done!) Now, moving on to the other side of your head, simply repeat the above process. Pay attention to the length of both braids – you want them to be even.
So, if you want to end up with just one braid going down your back, here’s what’s next:
You now have a total of six sections of hair from the braiding – three on each side. Starting on the outside, separate the outer two sections on each side. Then the remaining hair in the middle becomes the center section. And you start braiding the loose hair just as if you’re starting at the beginning of a regular braid. Don’t forget to make the braid tight. You’re not working near your scalp now, so it’s okay to pull, at least a bit.
As you get close to the end of your hair, keep braiding. You want to minimize any loose hair that could turn into a “pouf” at the end of the braid. (Some people like to leave a significant amount of hair lose at the end of the braid, but trust me. Let’s. Just. Not. Okay?)
We’re at the final step! Take a small “rubber band” (of course not a real rubber band, but one especially made for hair) and close the braid. It’s always a good idea to add an extra band or two for added durability. And you’re done! Now go show yourself off!


